- All-In-One Beekeeping for the Bees
- +1-608-728-8233
- info@beepods.com
Your First Hive Inspection

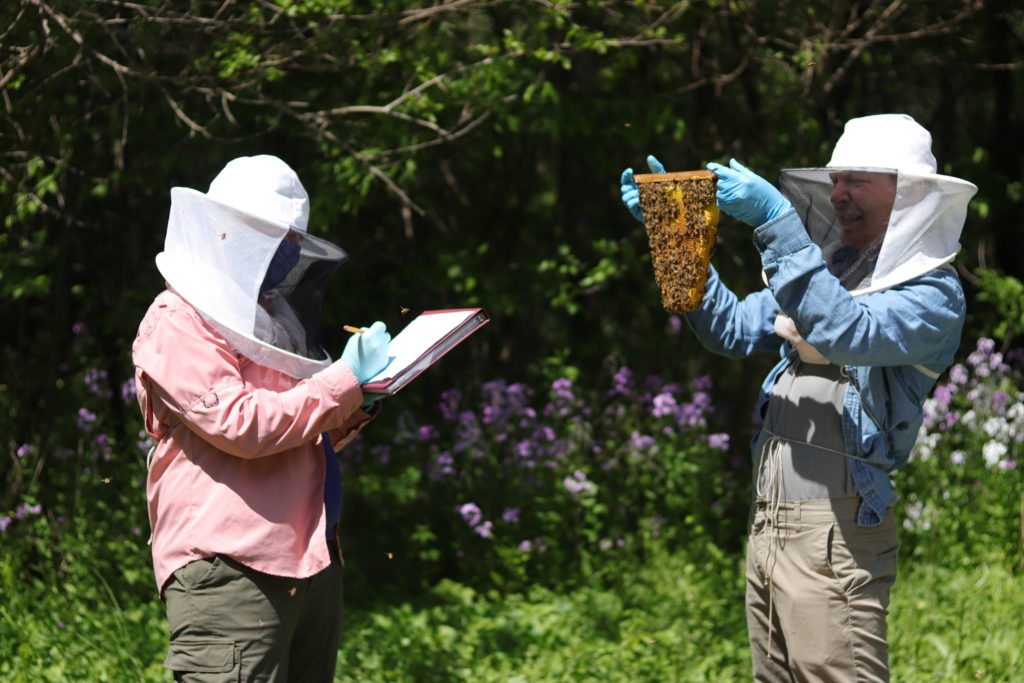
Hive Inspection: Beepod open
Hive Inspection: Beepod open
So, you’ve ordered your bees, waited with bated breath, installed them into your hive… now what? Your first hive inspection! This is an exciting step on your beekeeping journey. Inspections are one of the fun parts of beekeeping, and your first hive inspection shouldn’t be any different. In this post I’m going to go into the when’s, how’s and why’s of inspecting your hive for the first time. Let’s start with when.
Note: This information and more can be found in the Beepods Lab, and is written with the Beepod Vented Top-Bar Hive in mind.
When Should You Do Your First Hive Inspection?
This question has a two-part answer. The first part is simpler, so we’ll start there. One week is the rule of thumb. One week after you’ve installed your bees is the best time to have your first hive inspection. Pretty simple, just wait a week and jump in. Once that happy day rolls around, though, we deal with the second part of our answer. Just as important as waiting a week is checking that the weather is nice enough. You’ll want to wait for a warm day, at least 55 degrees, with no precipitation and little wind. It being too cold, raining, or windy all put additional stress on your bees that they do not need to deal with at such an early stage of hive construction.
To recap, a week gives your bees enough time to get their hive building well on its way and waiting for good weather means you aren’t stressing them out more than necessary. Both are important to take into account while you’re planning your first hive inspection. Next up is what to do on the day of, before you open the hive.
Setting Up the Inspection
Make sure you run through your equipment checklist first thing on inspection day. A hive tool, veil, mask, and inspection stand should be enough for the first hive inspection of the season. Check that your equipment is in good shape, too. Clean any residue or debris off your hive tool, look for tears or holes in your protective gear, etc. Once you have all the stuff you do need, make sure you aren’t bringing anything you don’t.
One thing to keep in mind is your scent. Bees have an incredibly acute sense of smell. You should avoid bringing in any kind of strong scents that might aggravate or overwhelm them. Lay off any cologne or perfume for the day. Also, don’t head to the hive straight after a run. Scent products and BO can both be(e) a bit much for your new friends. Scents can even hide in places you wouldn’t expect. Leather watch bands or bracelets, for example, can trap sweat or even carry odors of their own bees might not like. Keep your attire strictly to the essentials and you should be alright.
Last but not least, observe the activity around your hive. Is there a lot of bee activity? Generally, that’s good, but make sure there are no bees fighting near the hive entrance. That’s a clear sign of robber bees (workers sent by a different hive to steal resources), and you don’t want to open the hive for them. All that does is give them more opportunity to nab the good stuff. If you see robber bees, close the hive entrance, and hold off for a few days. If it looks clear, let’s get inspecting!
Starting the Hive Inspection
First put on your veil and gloves. Approach the hive with caution. After all, your bees don’t know you yet. The slower and more fluid your movements the less stressed your bees will be.
The first part of your inspection takes place outside the hive itself. Assess the activity of your bees: What are they doing? Do you see any bees flying around? Maybe they’re gathered on the outside of the hive. Are there lots of bees visible or just a few? Check for dead bees at the hive entrance. Pay attention to their temperament, do they seem aggressive or calm? Lethargic or active? The answers to these questions will help you get a handle on how your hive is doing.
Moving on, assess whether you should open the hive. Don’t go in if they’re in an aggressive mood or are making you nervous. Going back to their smelling prowess, bees can sense your pheromones. If you are anxious or stressed, they’ll notice, and it might affect them. Wait until you are calm and comfortable, so they know you’re safe. If you’re nervous, try going through steps away from the hive to make yourself familiar with the process.
Unlock the lid with the Allen wrench key. There’s a lock on each end of the hive. Grasp the handle in the center of the lid and lift gently, raising the edge of the opposite side first so that it opens away from your face. That way, if your bees are angry, they’ll fly away from you. Using this technique is safer for you and the bees.
Tracking Your Hive Inspection
Keeping a record of how your hive’s doing is important. Before you open up your hive, you should know exactly what you’re looking for. Beepods provides physical inspection forms to help you know what to regularly check, and Healthy Hive Management Software to track your data over time. Both tools will help you stay up to date with everything going on in your hive. You don’t need to check everything on the form for your first inspection (the workers won’t have had time to get all that much work done), but it’s a good place to start.
If you don’t have access to either the Beepods Labs’ Healthy Hive Management Software or inspection forms, still track your data. Make a list of what you’re checking, and mark down what you see. I mentioned in a few places above, and plenty below, to make a note of certain conditions, and whether you use the Beepods method or one of your own, this is an important part of the hive inspection process.
Back to the process itself, there are a few major things your first inspection will check for, like how much comb your bees have built, and whether the queen is alive and well. At each step, mark down what you see on your tracking sheet. Let’s pop open that hive!
Inside the Hive
Check if your workers released the queen bee from her cage. If all went well, they will have chewed through the marshmallow plug and freed her. Some workers might be reveling in her leftover pheromones. Mark if she’s out.
Next up, check to see if the workers have been busy building comb. This is the first thing they’ll get to work on as they use comb to store honey, pollen, and brood. Without comb they can’t get anything done. Make a note of how many bars they’ve been building on and what percent of each bar they’ve built out.
If there’s a good amount of comb and the queen has been released there’s a solid chance she started laying eggs in the cells. Check for eggs. If you find them, that means she hasn’t left or been killed, which sometimes can happen if workers don’t agree with her pheromones. This can happen if the queen is not genetically close to the workers. Her pheromones may be unfamiliar and off-putting, so they treat her as an invader. It’s not ideal, but these things happen. Sometimes the queen can survive long enough after being rejected to integrate fully and later become welcomed, but most of the time you’re going to need a new queen.
Eggs look like tiny, translucent grains of rice and the queen places them in the center of each cell. The queen will group them together in adjoining cells as she works her way around the comb. If you notice some eggs laid sloppily or multiple eggs in one cell, that means you have a laying worker bee. Workers can only lay drone eggs and do so only in extreme situations where there’s no queen. In this case, record what you found for later.
Finding the Queen
The queen is sneaky and will move away as you lift bars out of the hive. Check the frames front to back, using your hive tool to break up any propolis or beeswax that’s sticking them together. You can usually find her on one of the last bars you check. Look for a crowd of workers all facing a central point. The queen will be in the center being cleaned. To the human eye this looks like the workers prodding at or tickling the queen with their antennas. In reality they are keeping her sencilla clean, so she knows where to go and lay eggs. If she’s on the move she tends to cut a wide path and leave a wake behind her. If you can’t find her but have seen neatly lain eggs or brood, that’s okay. It’s enough of a sign that she’s alive and healthy.
Conclusion
That’s pretty much it for your first inspection. Safely reinstall all the frames and put the lid back on the hive. Lock the lid in place then carefully step away from the hive, trying not to block the entrance. And you’re done! Hopefully everything was looking just how you wanted it. If so, hold on to the information you got and use it to track how your hive progresses over the next few months. If things are looking out of whack, then it’s a good thing you know now rather than later. Either way, a good first inspection puts you right on track for a successful beekeeping season. Wishing you good luck!
Mathew Brandfass
Latest posts by Mathew Brandfass (see all)
- How Bees Use Comb - June 5, 2020
- Abnormal Comb: How to Make Your Bees Stop Making It - May 29, 2020
- Beekeeping Season: How to Make Spring Work for You - May 22, 2020
