- All-In-One Beekeeping for the Bees
- +1-608-728-8233
- info@beepods.com
Top Tips for Installing Your Bees

When installing your bees, make sure you have a carbohydrate-based solution to feed them
One of the most exciting times of the year is when your bees finally arrive and you get to install them into your hive. It’s a moment filled with anticipation and once your pollinators are in their hive, it’s like the start of an exciting adventure. You may be brand new to beekeeping or a seasoned beek who just wants to make sure you are covering your bases, but either way, we’ve compiled our top five tips for installing your bees.
Read ahead, fellow bee lover, and see if you learn something new.

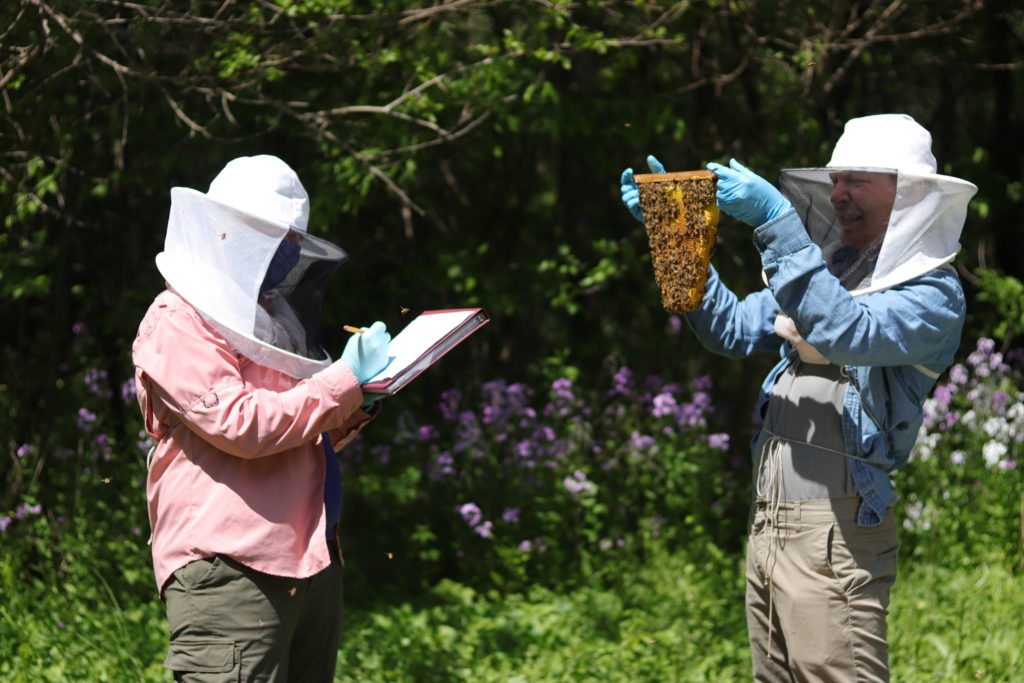
Installing your bees can be one of the most exciting moments for a beekeeper
Check Your Hive Placement
With all the focus on the bees themselves, it’s easy to forget about the hive. While the actual process of installing your bees is super important, let’s take a step back and make sure the “neighborhood” is ready for the bees.
Installation is step one, but it’s actually step 1c or 1d. Once you install the bees, you will want to let them acclimate to their new surroundings for a few days and they will acclimate much more quickly if they like their hive and their surroundings.
Ask yourself these questions to set your bees up for success:
Is my hive level?
Is it in a sunny spot in the yard?
Do my bees have an unobstructed flight path?
Are there quality sources of forage in my yard and nearby?
Are the bees protected from excess moisture and wind?
Bees are sensitive to their environment and even something like a moisture-accumulating valley can stress them out and impede their progress. It doesn’t have to bee that way!
Take the steps you need to take to make sure the bees have a nice neighborhood. You’d want the same for yourself!
If you need more information about creating an ideal neighborhood for your bees, check out our Bee Yard Setup and Siting Blueprint.
Get a Beekeeper’s Mindset
Bees are kind of like horses. Hear me out! They are sensitive to our moods and movements and will react accordingly. If you go into an interaction with your bees steaming angry and flailing your arms, they are not going to like it — and you won’t either as you will be at high risk for stings.
Having a beekeeper’s mindset is all about intentionality, breathing, and staying calm. Let’s break these down a little further.
Bee Intentional
Bees are living, breathing (yes, really) creatures. Human arrogance may guide you to just waltz right up and go about your business with them, but that approach is ill-advised, even if you’re wearing a full bee suit. Plan ahead for your bee interactions. Consider what actionable steps you will take when you’re around them so you’re prepared.
In this case, that means reading this blog, rereading this blog, and doing the same with bee installation videos so the steps come as naturally to you as possible.
Be purposeful with your movements. No jerking. No aggression. Just smooth, purposeful movements when installing your bees.
Breathe Well
Breathing exercises can help a lot before you interact with your bees and while you are installing them. A good place to start is with measured breathing. Try this:
- Inhale for four seconds
- Hold for five seconds
- Exhale for seven seconds
Increasing the length of your exhalation compared to your inhalation can physiologically calm you down. You can continue this breathing while you are installing your bees as well. To simplify: keep your inhalation and exhalation even, but extend both to slow your breathing rate down overall.
Keep Calm
Finally, maintain composure. Keep yourself calm. Find a practice that works for you, use your chosen skills ahead of time, before you’ve even interacted with the bees and make it easy to find a calm headspace when you are around them.
Some possible techniques include reciting a mantra to yourself, visualizing a positive experience with your bees before you go to your bee yard, or making sure you’ve slept and are well-fed. Interacting with bees while hangry is not a great idea. Bees get hungry too and you will want to make sure you’re prepared for that, which brings us to our next pointer.
Feed Your Bees

When installing your bees, make sure you have a carbohydrate-based solution to feed them
If your bees came from a package, they may have traveled for at least a few hours and are likely ready for some carbohydrates (who can blame them?). They will come with a feeder can in the package, but you will want to make sure you have a feeder jar ready to go before you install the bees into your hive.
You can use a simple sugar syrup, which is simple (ha) to whip up in your kitchen. Mix equal parts sugar and water in a saucepan over low-medium heat. Once everything is dissolved, you’re good to good.
Alternatively, you can make a Bee Tea to feed your bees. These delectable (for the bees) mixtures incorporate bee-friendly herbs and honey and can help create a robust, thriving spring colony.
Check them out below:
Honey Bee Healing Tea: Nutrition and Preventative Measures to Strengthen Your Colony
Learn How to Bump Your Bees
When you install your bees into your hive from a nucleus colony and you need to shift the bars together to one end of the hive, you may notice some bees hanging out in-between the bars, in the way really. They don’t know what they do, but you certainly don’t want to crush your new friends when you position the bars.
We use a technique called “bee bumping” to make sure everybody stays safe and… not smashed.
Here’s what you do:
If you notice some bees camping out between the bars, apply gentle pressure to the bees then back off the pressure and repeat to guide the bees and their small faces back down where it’s safe. You can use one side of the bar like a fulcrum, with one end rested against the end of the bar next to it and move the bar in your hand in a gentle circular motion. Repeat with the other end of the bar until you no longer see bee faces popping up between bars.
Master the Queen Cage

When installing your bees, understanding how to work with the queen cage is key
The queen cage is a thing of magic and mystery. It comes with your package of bees and requires a special touch to make sure your workers can adjust to the queen’s pheromones and everybody becomes one big, happy family in your hive. Fortunately, if you follow a couple of key pointers, you will have a higher chance of family cohesion.
First of all, familiarize yourself with what’s attached to your queen cage. Whatever material is attached to the cage is what you will then secure to the bars in your hive. Queen cages can come with a small metal strip, a strip of plastic, a metal hook, or even a length of twine attached at the end.
If you’re lucky enough to have a metal hook, just use the hook to rest the queen cage in between two bars. Otherwise, you can use a push-pin to secure the metal or plastic strip to the top of a bar or if you have a staple gun on hand, here’s another reason to bust it out.
Additionally, you can opt for a rubber band. Position the rubber band around the bar and then place the queen cage between the rubber band and the bar, nice and snug.
The Marshmallow
Whichever way you Macgyver your queen cage to the bars, make sure the marshmallow end is pointed upward so if the attendant bees in the cage decide they’ve had enough (RIP), they won’t block Her Highness’ exit.
Did we mention the marshmallow? Yes, you will want to remove the cork from the queen cage opening and replace it with a mini marshmallow. Feel free to eat a handful of the marshmallows while you’re at it. Consider it a rehoming tax.
One more tip! If it seems as though it’s taking a hot second for the workers to chew the marshmallow and baby bird it to the queen, you can poke a few holes in the end of the marshmallow to speed the process along.
This may seem fussy, but these steps can all happen simultaneously. The hardest part comes next: leave your hive alone!
Let Your Bees Adjust

Your worker bees will chew through the marshmallow until she has room to emerge
You just installed your bees. It’s so exciting! You might want to observe and poke around your hive, but DON’T. Once you install your bees, you need to give them a few days to adjust. They need to start exploring the neighborhood, decorating (building comb) on the bars, and getting used to their new queen.
Before you know it, you’ll be watching them create bars of comb, fill them with honey and brood, and will learn to recognize some of their most interesting behaviors (festooning, scenting, guarding the entrance to the hive, and more).
If you’ve read this far, I know you’ve got patience and can wait a few days for your bees to get used to their hive.
Final Thoughts
If you want to know more or need a walkthrough of the step-by-step process for installing your bees, check out Beepods Lab. It’s our hub for bee information and there are videos that can guide you to install your bees from a nucleus colony, a package of bees, and even a gentler alternative to package installation. Bee installation is just one topic of dozens covered in our Lab and it’s a fabulous resource for learning about bees and refining your skills.
We wish you a successful bee installation and if you have any additional questions about the process, feel free to email us at info@beepods.com. We’re happy to help!
See Also:
Caitlin Knudsen
Latest posts by Caitlin Knudsen (see all)
- How to Change Your Students’ Lives With Project-Based Learning - November 20, 2020
- Watch The Pollinators to See How We Can All Choose to Change Agriculture - November 13, 2020
- 6 Cold Weather Feeding Tips You Have to Know - November 6, 2020
