- All-In-One Beekeeping for the Bees
- +1-608-728-8233
- info@beepods.com
Our Top Inspection Tips for a Healthy Hive

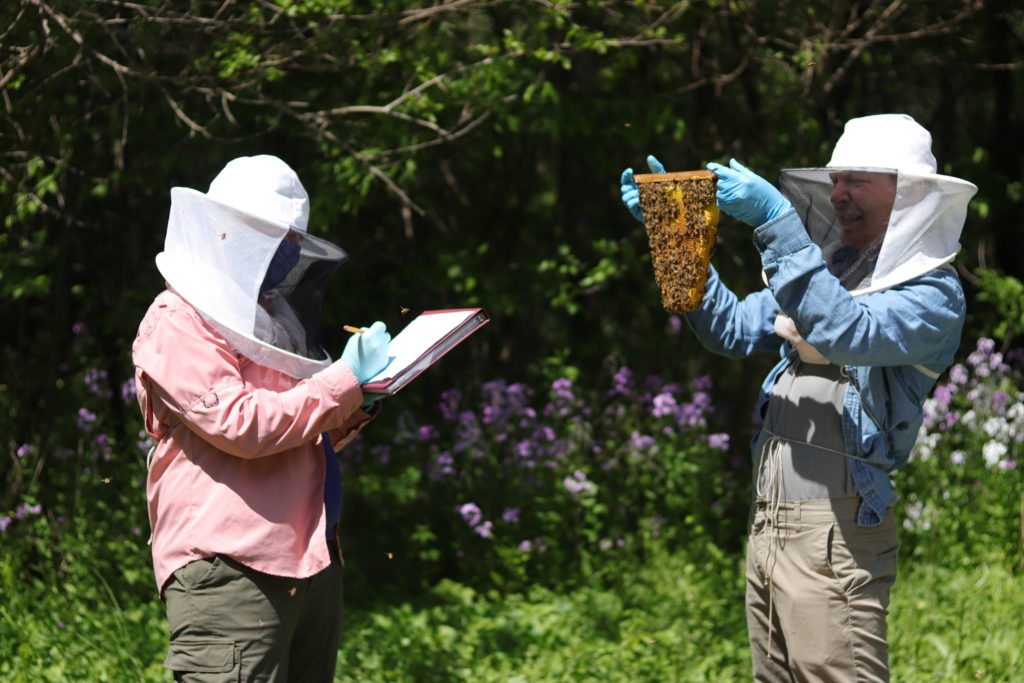
Beekeepers inspecting hives and recording information in the Beepods Inspection Form.

Beekeepers inspecting hives and recording information in the Beepods Inspection Form.
Today, we’re breaking down how you can bring your A-game to every hive inspection with our top hive inspection tips! Take our advice and make your next inspection a productive, informative, and pleasant experience for both you and your bees.
1. Pick the Right Time to Inspect
Choosing the right timing and conditions to perform your inspection plays a big part in its success. Try to visit your hive mid-day, when worker bees are likely to be out and about: the fewer the bees in the hive, the fewer to maneuver and manage as you do your thing. Be mindful of the weather, too. Bees hate rainy days and could get more aggressive than usual with you due to a drizzly inspection. You should also avoid inspections during extremely hot or cold weather.
2. Record Your Observations

The Beepods’ Hive Inspection Kit has everything you need to carry out a thorough inspection!
Beekeepers who track what they observe during hive inspections have a better understanding of their bees’ health! There is a lot of valuable data to take down during an inspection, and we’ve got you covered with resources to help you manage it all. The Beepods Inspection Kit guides beekeepers through all the essential inspection checkpoints. Use it to make sure you cover your bases and collect the information you need to help your hive stay healthy.
3. Prioritize Bee Safety
A big part of beekeeping for the bees is making sure the bees are safe and happy when you’re interrupting them for a hive inspection. You can take several steps to make inspections as pleasant as possible for the bees and for yourself! From protecting them while you move bars, to intentionally creating a calm atmosphere, these simple precautions can make a world of difference for the bees. We wrote a whole blog on keeping bees safe during hive inspections that you can check it out here.
4. Set Up for a Great View

Beekeepers using the tabletop stand to view and repair comb.
The best way to get an up-close and unobstructed look at Beepod hive bars is with our tabletop stand. Keep this tool on-hand during inspections to study comb and perform bar surgery without needing another person to help you. Plus, your hands are free to take notes and record your observations. Once you use a stand during an inspection, you’ll never want to do another without it!
5. Know What to Look For During Different Seasons
Different times of year present different scenarios you’ll want to look for during hive inspections. In the springtime, beekeepers should keep an eye out for signs of swarming. These might include new queen cups and a population surge. If you think a swarm is on the horizon, you might need to consider taking action.
In the fall, you should be tracking how well the bees are stocking up on honey for the colder months. If the bees aren’t producing enough honey, you can give them a hand by feeding them. There are several ways you can feed them and help them ramp up their production. One of our favorites is collecting honey during their bustling summer season, storing it, and feeding it back to them when they need a nutritional boost!
6. Keep Track of The Queen
The queen and her health should be a priority during an inspection at any time of year. Your first inspection after installation should have confirmed that she escaped the cage. After that, you need to make sure she’s doing well and carrying out her royal duties in the hive.
Always make an effort to find the queen as you examine the hive, but know it’s okay if you don’t. There are indicators that will give you an idea of how her highness is doing. Has she laid eggs? The healthier the queen, the more organized and tidy the brood pattern will be. Keeping track of how the queen bee is faring is key to staying on top of your hive’s overall health.
7. Mark Your Bar Locations

Marking bars with Sharpies helps beekeepers keep track of their placement in the hive.
Some beekeepers might overlook this last of our inspection tips, and probably really regret it. When you’re removing and replacing bars, it’s easy to lose track of what-went-where. The trouble is that misplacing bars during an inspection can disorient your bees and lead to undesirable comb construction. Mark the tops of your bars with a Sharpie to reference the location for each bar. It takes just a moment, and will prevent messes down the road!
At the end of the day, planning, observing, and keeping track of what’s going on in your hives is the best way for you to help your bees stay healthy and productive. We hope these inspection tips will help you feel more informed and prepared for your next visit to your hive!
Kanoe Riedel
Latest posts by Kanoe Riedel (see all)
- This Spring, Don’t Forget Why Bees Are So Important to Our Environment - March 26, 2021
- 11 Awesome Uses for Your Stored Honeycomb - March 2, 2021
- How the Right Beekeeping Equipment Makes Inspections Better for Beekeepers and Bees - February 12, 2021

